The versatility of QuickVet lets the user access processes from multiple places rather than closing and opening several screens. For example: Pharmacy is located in areas where you may need to reference the drug list in order to continue working in the selected area.
The user must always use an item number. The system depends on this number or code to record the billable properly. Under INVOICES or ORDERS, if an item number is not shown, the system may not recognize it. Even miscellaneous items have an item number (usually "MISC").
Yes, while in Departure Details, you can make a QUICK SALE and continue.
Not an acceptable business practice since the recorded activity is noted to an employee who did NOT do the action. Recommend that the former employees can be de-activated (select EMPLOYED = NO in EMPLOYEE INFORMATION) to keep them on file, but not shown on the drop-down menu of active employees.
Another trick is to UP ARROW from the start of the WORK BY list. When you use the UP arrow (on the keyboard), it jumps to the bottom of the list, working up through the list.
Another trick is to UP ARROW from the start of the WORK BY list. When you use the UP arrow (on the keyboard), it jumps to the bottom of the list, working up through the list.
Yes, there's a way to change the arrival date! Go to DEPARTURES -> KENNEL, and double-click on one of the boarding visits. The Boarding Details will allow the user to change the ARRIVAL (in the upper right corner) date as well as the Arrival time.
Once you have PROCESS HOURS (BUSINESS->EMPLOYEES->PAYROLL), click REPORTS|SUMMARIES. Click INDIVIDUAL HOURS REPORT. Select the correct pay period. The first report will be the HOURS SUMMARY, simply go to REPORT-> CLOSE. The second report will contain ALL information (times, hours, etc.) for each employee. Simply go to REPORT->PRINT and click PRINT.
When you click on DISCOUNT in Final Billing, the Discount form has 2 areas. The top area (with which you are familiar) is to apply a discount to all departing invoices. The bottom area (called Discounts Applied to Individual Departing Invoices) allows you to apply discounts to individual invoices! The table in this bottom area shows the departing invoices. You can select a DISCOUNT TYPE for a specific invoice, or enter a discount to that specific invoice by entering the dollar amount in the DISCOUNT field!
To change the Tab Names on the Basic
Appointment Scheduler:
1. Go to SCHEDULING -> DOCTORS
2. Click on the next record in the desired column (Doctor 1, Doctor 2,
Doctor 3, Doctor 4) on the APPOINTMENTS tab, where you want to start
making the change. You can COPY the value you want (highlight one of the
records in the column, press Ctrl + C
3. Click UPDATE DOCTOR
4. A dialog will appear, ENTER NAME EXACTLY... Enter the Name exactly as
you want it to appear or if you copied the value, Ctrl+V to paste the
desired value, 30 characters maximum.
5. Click OK
6. A question will confirm your desire to change ALL entries of that
column from the record you highlighted onwards. Click YES to make the
changes, or answer NO to cancel.
7. The change will appear momentarily. The message bar will show the
progress of the changes.
That's the way to change the entries under that column for all future
dates. You can also highlight single records, click EDIT, then type in
the desired value.
To access or change the Weight
Ranges for Weight-Dependent Procedures:
1. Go to UTILITIES -> SYSTEM -> SETUP.
2. Click on Tab 6.
3. Click the EDIT button to make changes.
4. At the top, you'll see the WEIGHT RANGES. You can now edit
them to your preferred weight ranges.
5. When you're done, click CLOSE to close
SYSTEM SETUP.
QuickVet allows 2 different weight ranges, one of all hospital
procedures, and one for all boarding procedures.
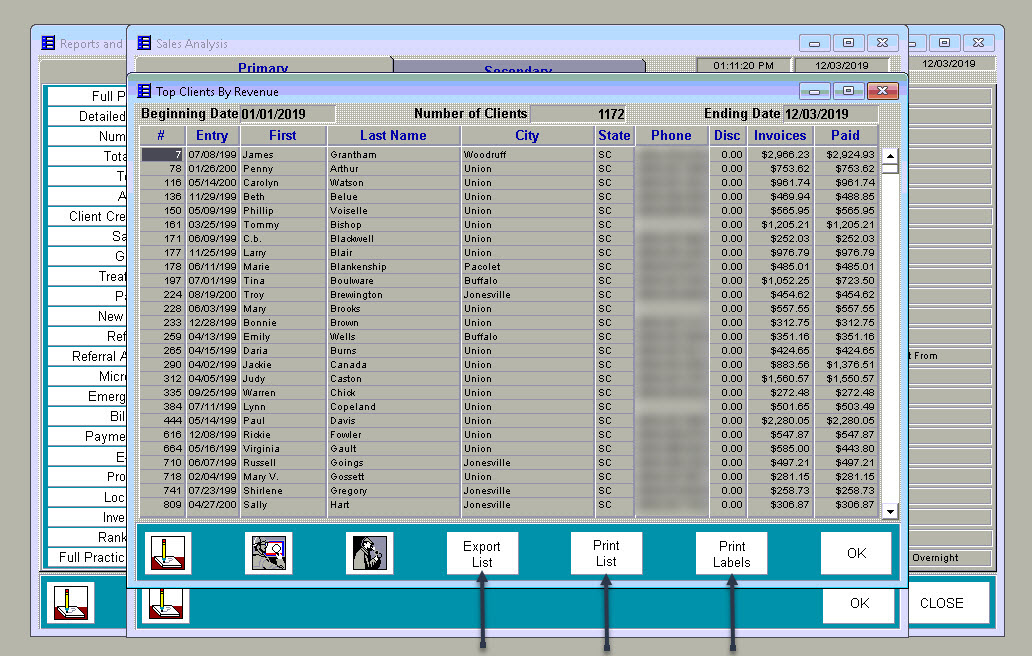
To look up a list of clients that have have spent a certain amount so far
this year:
1. Go to
BUSINESS -> REPORTS & ANALYSIS
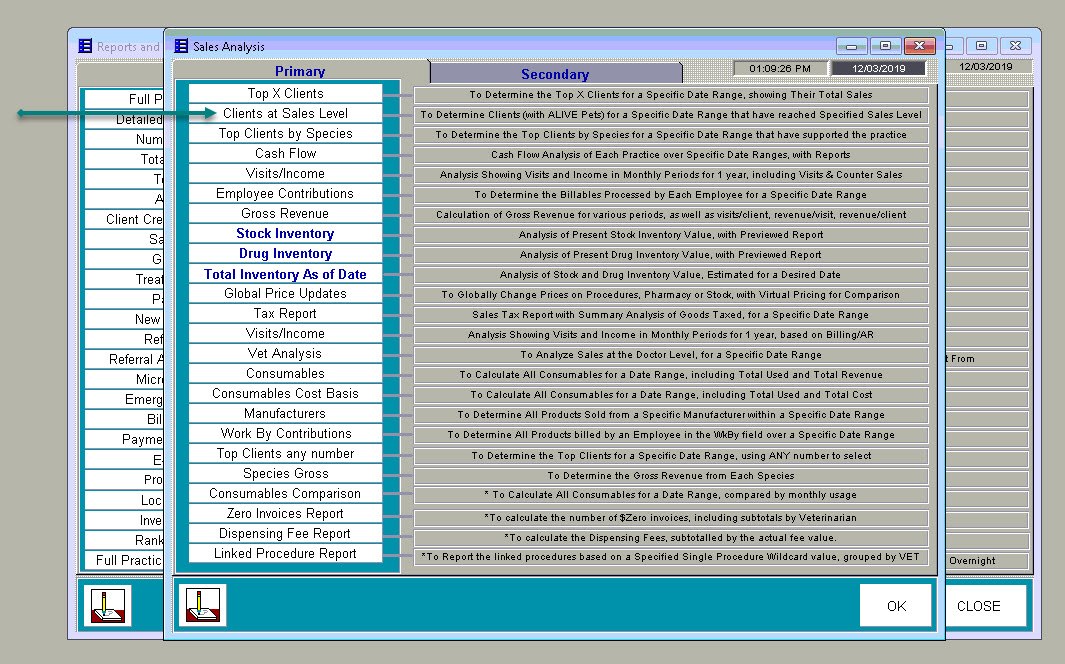
2. Click SALES ANALYSIS (teal arrow).
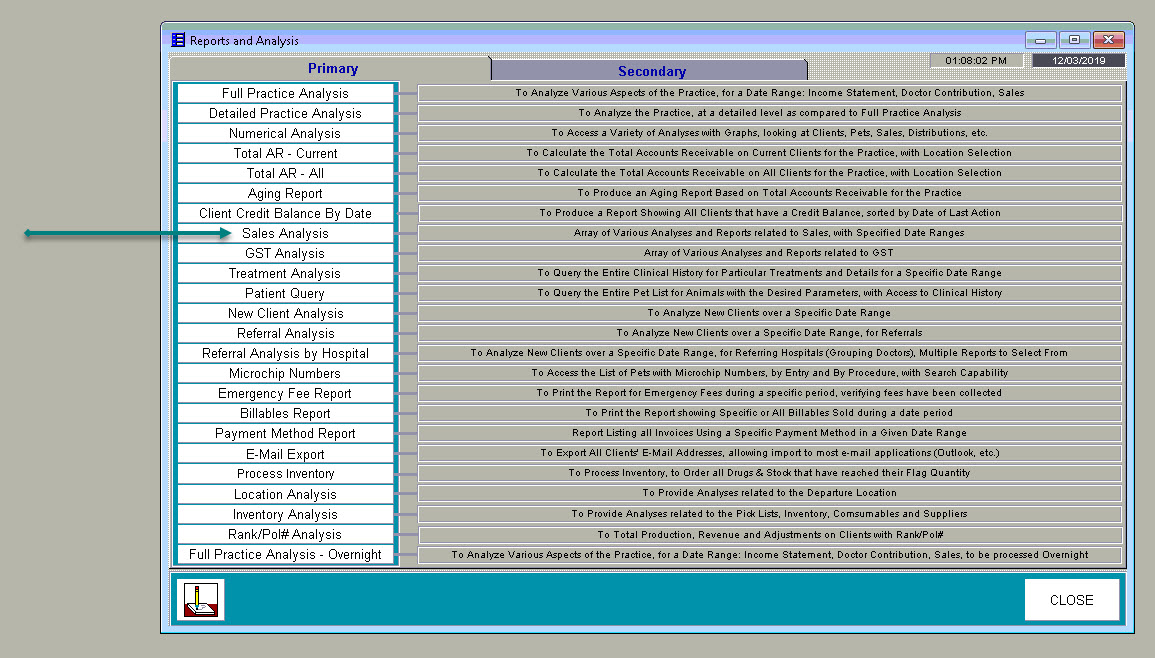
3. Click CLIENTS AT SALES LEFVEL (teal arrow).
4. In the DATE RANGE window, click on the desired date range
(yellow arrow), enter the MINIMUM TOTAL SALES PAID (purple arrow), specify
SMALL ANIMAL ONLY (teal arrow), then click OK (black arrow).
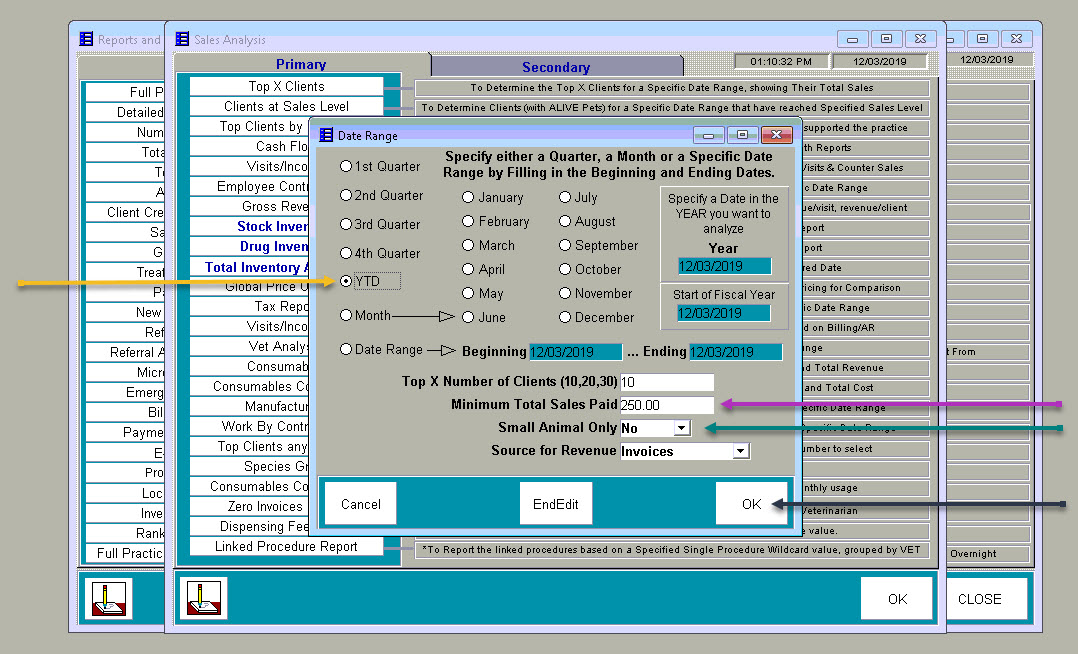
5. The list of clients will be shown, and you can click EXPORT LIST, PRINT LIST, or PRINT LABELS (black arrows), and click OK when done.
To Write Off Accounts in Accounts Receivable:
To Update Prices Globally:
To refund money to a client and provide a Credit Invoice:
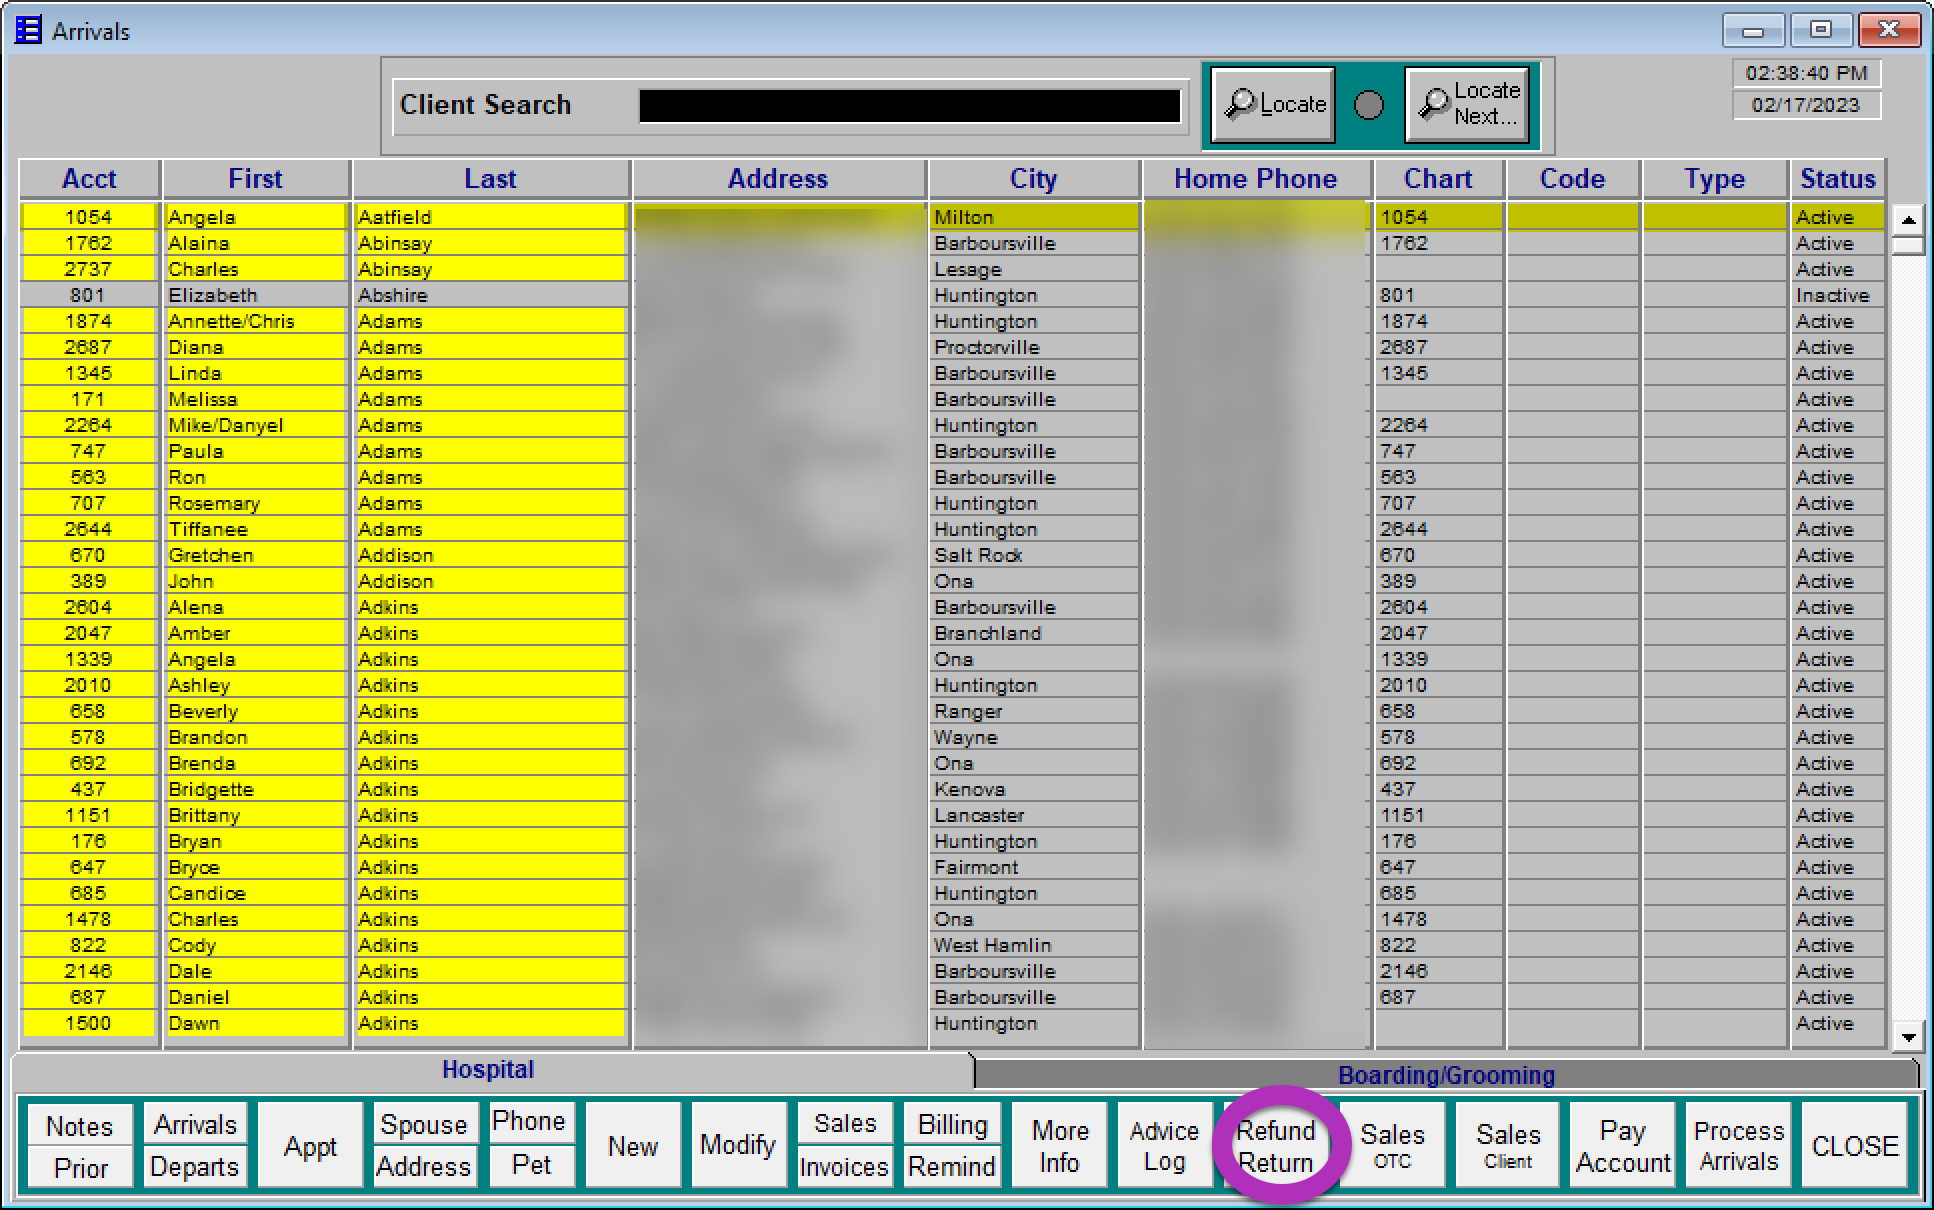
If you looked up by phone number or account number, and are at the Client/Pet Details page, click the REFUND RETURN button (indicated below).
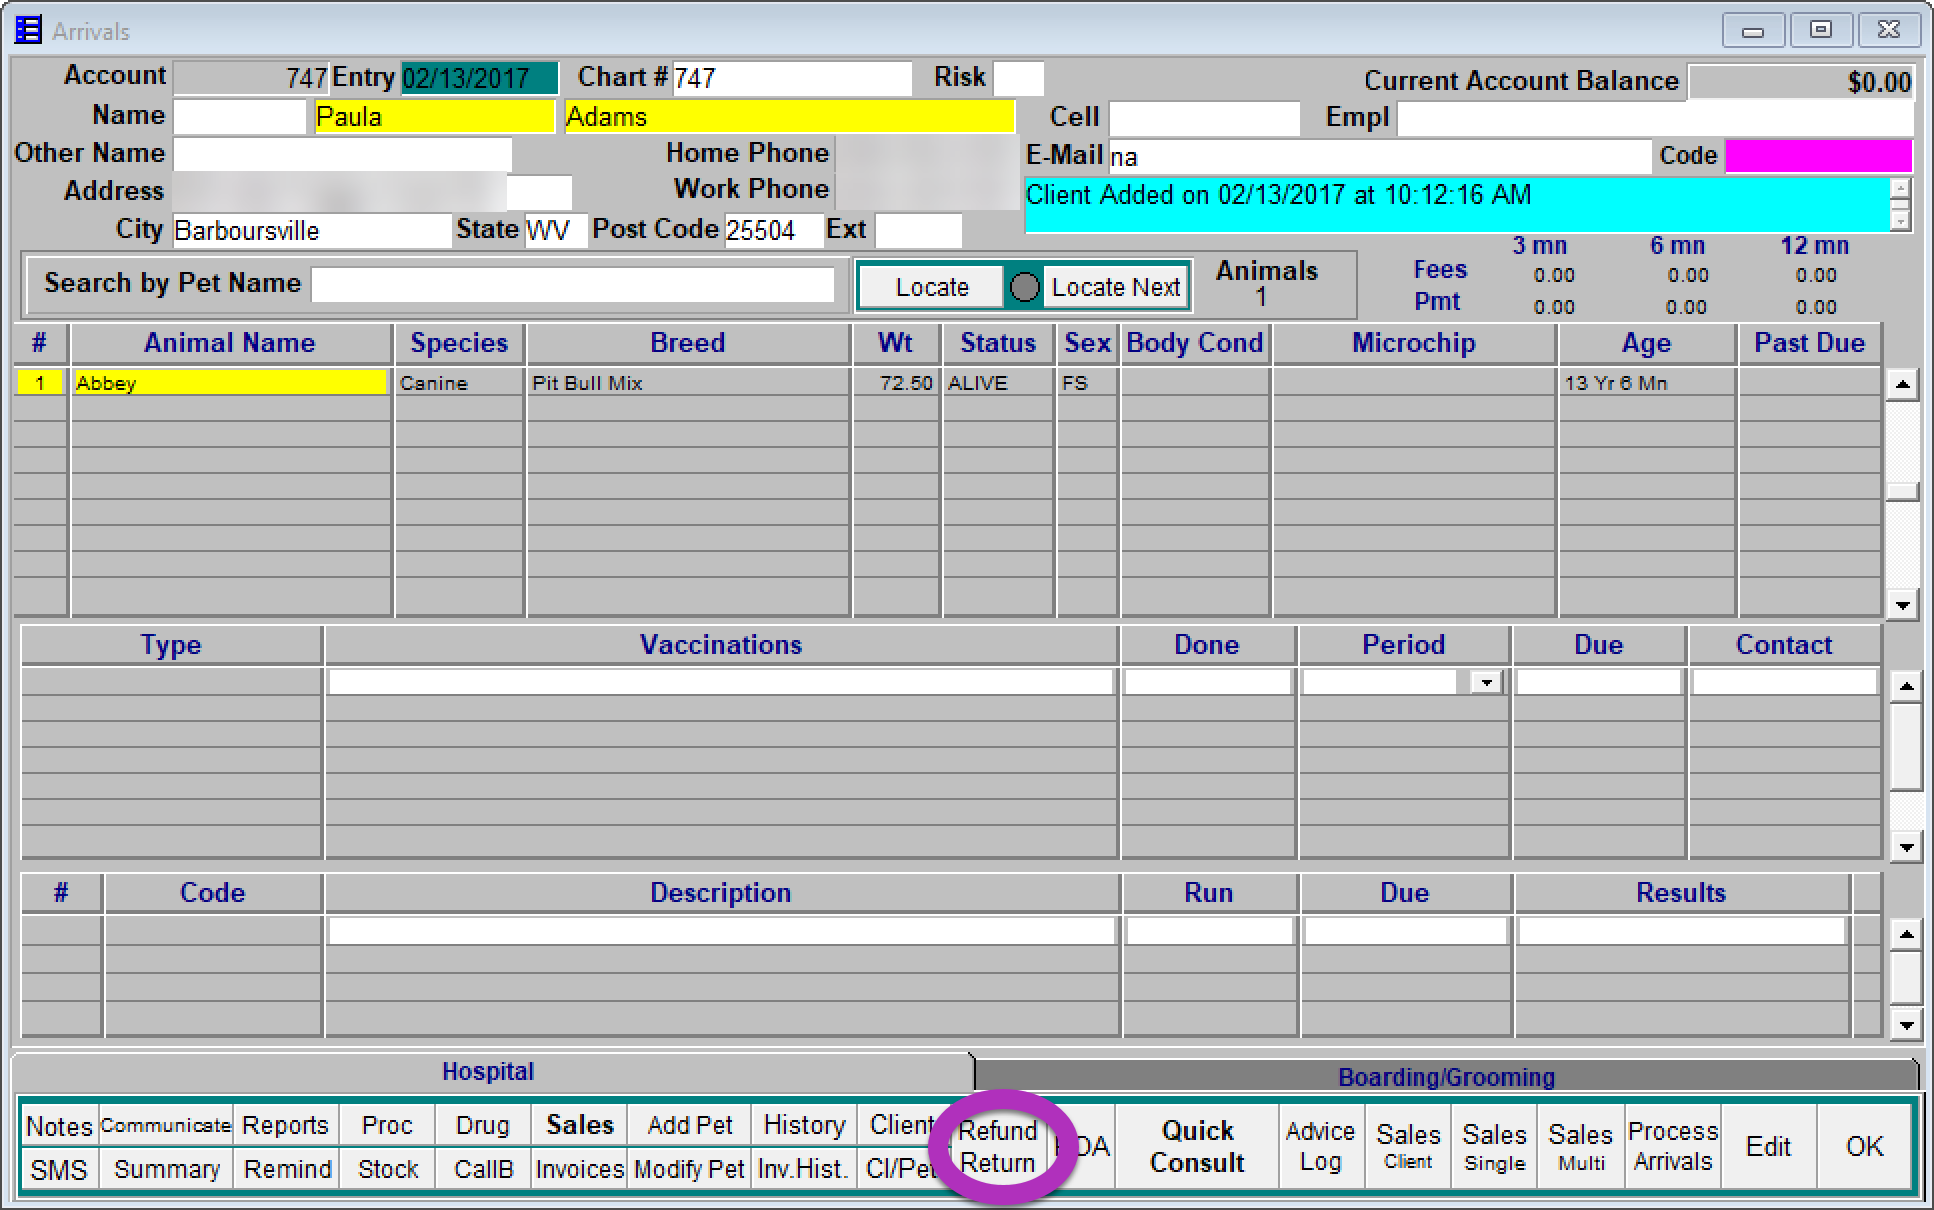
NOTE: If you get a message that the current user is not authorized for Refunds and Returns, you need to go to BUSINESS --> EMPLOYEES --> INFORMAATION, look up the desired employee/staff and answer YES to the question: Authorized to Process Refunds/Returns/Delete Arrivals
To add a credit or make an adjustment to a client's Accounts Receivable:
To process a return for a client:
If you looked up by phone number or account number, and are at the Client/Pet Details page, click the REFUND RETURN button (indicated below).
NOTE: If you get a message that the current user is not authorized for Refunds and Returns, you need to go to BUSINESS --> EMPLOYEES --> INFORMAATION, look up the desired employee/staff and answer YES to the question: Authorized to Process Refunds/Returns/Delete Arrivals
© Copyright 1993 - ServiceVet Technologies LLC, All Rights Reserved.
Designed and maintained by Evolving Web Creation @ www.evolvingwebcreation.com