When you set up the printers for the AHMS, please follow these guidelines to add/name/configure the printers at EACH computer or session:
1. When you install printers, you must first install them on the ADMINISTRATOR account on the Terminal Server, then log on as each user and add the printers if they don't appear.
2. Rename the printers so that they make sense, including which type of printer and then the location. Keep the name of each printer short and concise. Here's an example of properly named printers.
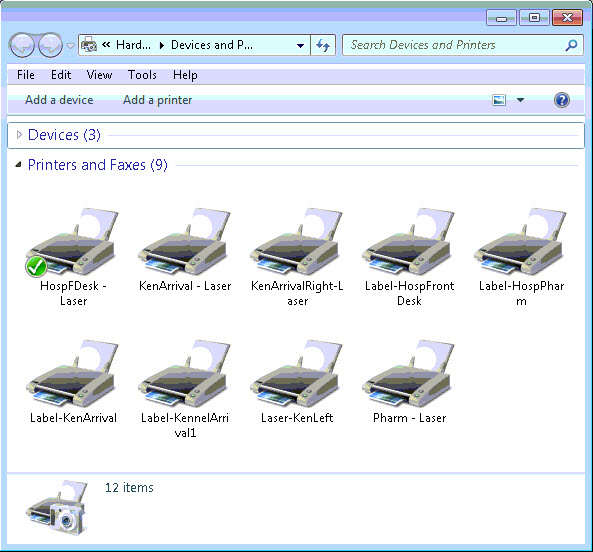
3. The WINDOWS DEFAULT PRINTER must be set to the desired laser printer for each session. For example, the screenshot above shows that the HospFDesk-Laser is set to the Windows Default Printer (has the green check mark).
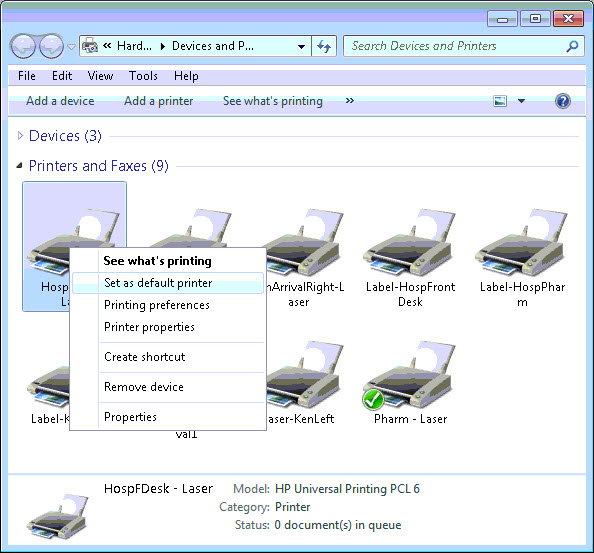
4. If the WINDOWS DEFAULT PRINTER is set to a Label Printer or a non-existent printer, right-click on the desired laser printer for that session and a menu will appear, as shown below. Click on SET AS DEFAULT PRINTER, and the green check mark should now appear on the desired laser printer.
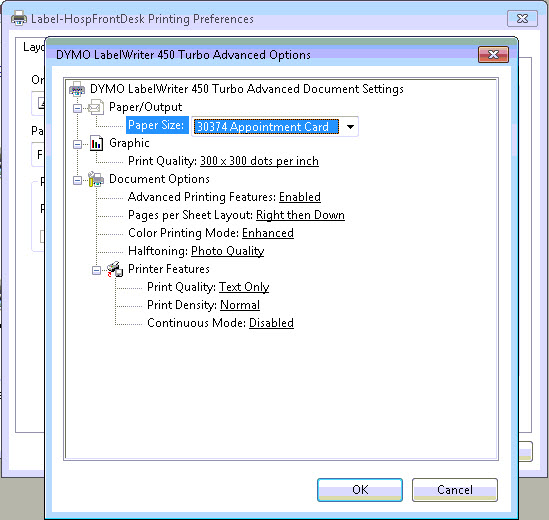
5. For the Dymo LabelWriter 450 Turbos or the Dymos you're using, you must set the correct printing preferences for EACH Label Printer at EACH session. Right-click on each Label Printer, then click on PRINTING PREFERENCES.
a. Set the ORIENTATION to LANDSCAPE, as shown below.
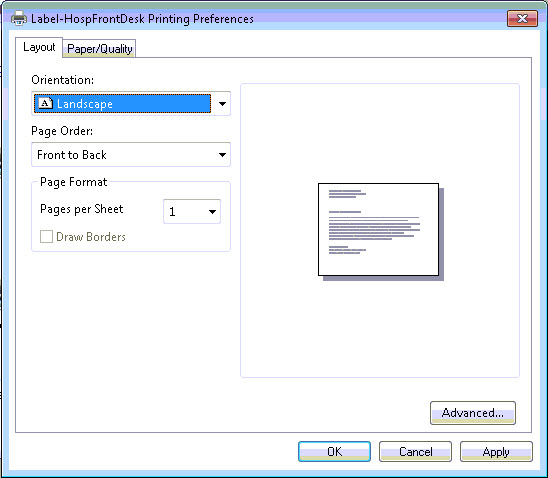
b. Click ADVANCED, then set the PAPER SIZE to one of the following sizes: 30374, 30256, 30324. Select the size that your hospital uses. the size should be on the label box, a 5-digit code. It will NOT be 30252 (this is the default size when you install the printer).
6. Click OK, then APPLY & OK until all windows are closed.
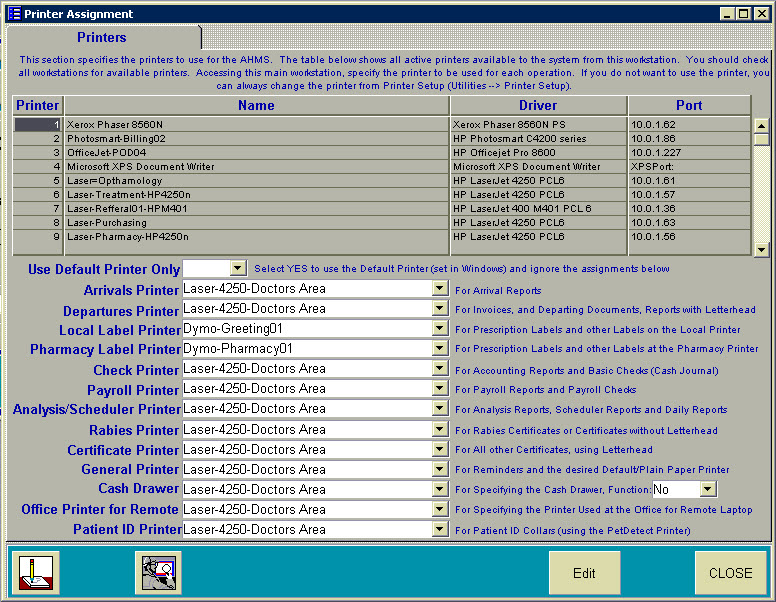
7. Now, open the AHMS and go to UTILITIES --> PRINTER ASSIGNMENTS, as shown below. Click EDIT then select the desired printer for each of the functions/reports. It's critical that you select each printer from the dropdown list, then hit ENTER. Once completed, click CLOSE.
8. Close the AHMS, then log off the session.
8. Start the session, open the AHMS, and continue using the AHMS.
Note: If you do change the Windows Default Printer, you must close the AHMS then restart the AHMS to make sure the AHMS sees the correct Windows Default Printer.
Troubleshooting
© Copyright 1993 - ServiceVet Technologies LLC, All Rights Reserved.
Designed and maintained by Evolving Web Creation @ www.evolvingwebcreation.com